The page is loading
Info

Step 1: Enter Background Information

Enter the information on the right about this project.

The Exposed Mass Timber Calculator is designed to help users determine if their encapsulated mass timber construction (EMTC) compartment designs are code-compliant with the 2025 edition of the National Building Code of Canada (NBC).

This tool evaluates the necessary dimensions of mass timber elements and the permissible percentages of exposed mass timber elements, including beams, columns, walls, and ceilings within suites and fire compartments.

How to use Exposed Mass Timber Calculator Text:

To use the tool, users will need to input the following information regarding their compartment design:

  • Compartment size and perimeter wall layout
  • Compartment designation: Suite or Fire compartment
  • Interior compartment design, including all partitions and openings
  • Location and size of all mass timber elements
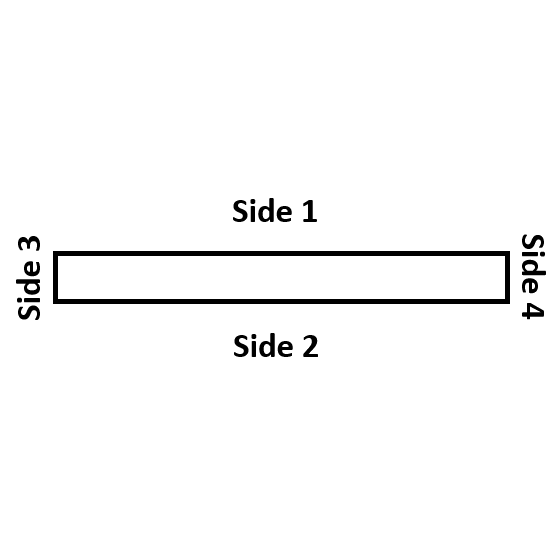
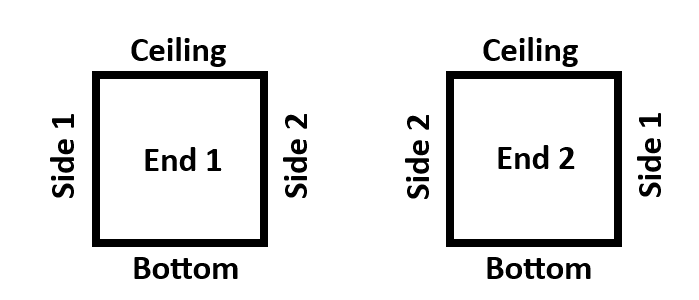
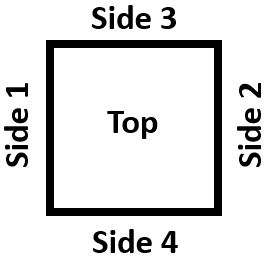
    1. Designation of how many sides of the mass timber element will be exposed to fire
    2. Designation of which mass timber surfaces are encapsulated vs exposed
    3. If encapsulated, designation of where the encapsulation is located

If the entered compartment configuration is not code-compliant, the tool will generate warnings to alert the user. This feature enables the user to identify whether a compartment design complies with the 2025 NBC.

The tool will output a 3-D image of the compartment that the user can view, along with corresponding notes providing the encapsulation requirements and warnings.

A list of definitions of important building code terms is also provided for reference.

While the Exposed Mass Timber Calculator facilitates an effective evaluation of permissible exposed mass timber elements in EMTC buildings, it is important to note that numerous other fire safety requirements must be considered in the building design. It is essential to refer to the relevant code articles to ensure compliance with these additional provisions.

The Exposed Mass Timber Calculator has been developed for information purposes only. Reference should always be made to the Building Code having jurisdiction. This tool should not be relied upon as a substitute for legal or design advice, and the user is responsible for how the tool is used or applied.

We appreciate any feedback or questions that you may have regarding The Exposed Mass Timber Calculator. Please email us via our helpdesk at cwc.ca.

Info

Step 2: Design the suite

Create a perimter for your suite. This is an enclosed area consisting of walls on the perimeter.

To create the first wall: Left-click the starting point of a wall, drag your mouse to where the wall should end, and release the mouse button. Press down on SHIFT key to make the wall horizontal, vertical, or diagonal.

To create subsequent walls: Select one of the orange points and drag your mouse to where the wall should end, and release the mouse button.

To enclose the suite: Connect the last point you drew with the first point you drew to enclose the suite. Once the suite is enclosed, you can move on to the next step.

To select a wall or a point: While holding the CTRL key (or COMMAND key on Mac), click on a wall or point you are interested in fine-tuning. You can fine-tune its position, length, or thickness.

To drag a point: Left-click on the desired point and drag it to where you want it to go.

To move the canvas: Right-click a point and drag your mouse.

To zoom in or out: Roll the wheel on your mouse forward to zoom in, backward to zoom out.

When you are done, click on the "Next" button at the bottom of the screen.

Info in a suite

Step 3: Edit the suite

In this step, you can add various objects to the suite and edit their properties. Also, you can edit the properties of the ceiling.

To modify the ceiling: Click on the Ceiling button on the right. You can set the ceiling height and the fire properties of the ceiling.

To add an object: Click on the Add Object button on the right, and select the object you want to add.

To move or transform an object: You can move the object around while pressing down on the move icon at the center of the object. You can also rotate it by pressing down on the rotate button or resize it by pressing down on the edge of the object.

To select an object: You can select an object by clicking on the object while holding the CTRL key (or COMMAND key on Mac). Then, you can modify its properties from the sidebar on the left.

To add a door or window: Select a wall, then click on Add Object button on the sidebar on the left.

Once you have set the ceiling height, 3D Visualization and Outcome will be available.

Info

Step 4: Visualize the 3D

To change the camera angle: Move your mouse while pressing down on the left mouse button.

To pan forward, backward, left or right: Move your mouse while pressing down on the right mouse button.

To pan up or down: Move your mouse while pressing down on the left mouse button on the SHIFT key.

To zoom in or out: Move your mouse wheel.

To edit the suite, click on Step 2 or 3 buttons or Previous button at the top.

Report icon

Step 5: See the outcome

The calculation results are shown, below. On the right side, you can see whether the suite you have constructed complies with the National Building Code.

Explanation

  • Type of suite:
  • Total area of suite perimeter walls:
  • Total area of suite ceiling area:
  • Exposed beams and columns:
  • Exposed walls:
  • Wall area encapsulated by 50 minutes:
  • Wall area encapsulated by 80 minutes:
  • Exposed ceiling:
  • Maximum FSR of exposed beams and columns:
  • Maximum FSR of exposed walls:
  • FSR of ceiling, if it is exposed:
  • Are there any exposed walls?:
  • Are there any exposed walls that are less than 4.5 metres apart?:
  • Which exposed walls are less than 4.5 metres apart? (IDs are shown. To see the IDs, go to Step 3 and click on the Show IDs button.):
Encapsulation drawing

Edit the encapsulation area

Use the drawing space on the right to edit the encapsulation area.

To draw an area, left-click on the border of the figure or anywhere inside it. Then, drag your mouse while holding down the mouse button, and release it to draw a side. Repeat this process until a figure is closed.

You can do this multiple times to enclose multiple areas.

Once you are done, click on the white "Go Back" button.

Don't forget to click on the Apply button to finalize your edits once you go back.

Hint: If you have a hard-time seeing the object, trying zooming in or out.

There are unsaved changes. To save them, click the Go Back button, then click the Apply button.

Icon for add object

Add Object

Move mm inches .
Move mm inches .
Rotate degrees.
Change the length to mm inches and apply the change to the .
Ceiling Height mm inches .
Length: mm inches .
Width: mm inches .

This is the height of the column. By default, it is equal to the ceiling height or up to the bottom of a beam if it's under a beam. If the default is okay, leave the height boxes empty or "0". If you want to manually set the height of the column, input the height, below.

Height: mm inches .
Distance from the bottom: mm inches .
Depth: mm inches .
Thickness mm inches
Distance from ceiling ('0' means it is attached to the ceiling): mm inches .
Wall material .

Ceiling is exposed to fire by default.

Mass timber wall is exposed to fire by default on both sides.

To edit the fire property, choose a side that you want to edit, first.

2 sides of a mass timber wall

A beam is exposed to fire on all sides that are not touching either the ceiling or a perimeter wall.

To edit the fire property, choose a side that you want to edit, first. If a side cannot be chosen, it means the side is embedded in a wall so it is fire-protected already.

Sides of the beam labelled

A column is exposed to fire on all sides that are not touching either the ceiling or a perimeter wall.

To edit the fire property, choose a side that you want to edit, first. If a side cannot be chosen, it means the side is embedded in a wall or ceiling so it is fire-protected already.

Sides of the column labelled

A perimeter wall is exposed to fire on the side that is facing the suite.

Please set the ceiling height first.

Choose which side you want to edit for its fire property. The selected side will be highlighted in the diagram on the right.

Is a part or all of this protected by encapsulation?

Select the area of encapsulation by clicking on the button, below:

You have completed this step.

You have an unsaved edit. Click on the Apply button to finalize the edit. If you want to discard this change, simply click on another tab or de-select this object from the drawing.

ID Type  

This is the suite.

To add a beam, column, mass timber wall, or lightframe wall: click on the Add objects button. Then, select the desired object to add to the suite.

To add a door or a window: CTRL + Click (or Command + Click on Mac) on a desired wall. Then, click on Add objects on the left sidebar and select the desired object.

This is a point at the end of a perimeter wall.

To move it: click on the button Move and adjust its position manually. Or, drag the point to where you want it to go.

This is a wall that encloses your suite.

You can move it by clicking on the Move button or edit its length and thickness by clicking on the Edit button.

This is the ceiling of the suite. You can modify the height of ceiling by clicking on Edit or modify its fire property by clicking on the Fire property button.

This is a door. You can modify its position by clicking on the Move button or its length and height by clicking on the Edit button.

This is a window. It could also represent an opening without glass. You can modify its position by clicking on the Move button above. You can also modify its length, height, or distance from the floor by clicking on the Edit button.

This is a beam. It is placed on the ceiling. You can modify its dimensions and position by dragging it in the canvas area, and by clicking on the Move or Edit button on this sidebar.

Dimensions you can set: length, width, depth.

You can modify its fire properties by clicking on Fire property button on the sidebar.

This is a column. It is placed on the floor and extends onto the ceiling by default. However, you can modify its height as you see fit.

You can modify its dimensions and position by dragging it in the canvas area, and by clicking on the Move or Edit button on this sidebar.

Dimensions you can set: length, width, height

You can modify its fire properties by clicking on Fire property button on the sidebar.

This is a lightframe wall. It is by default exposed to fire.

You can modify its length and position by dragging it in the canvas area, and by clicking on the Move or Edit button on this sidebar.

Dimensions you can set: length, thickness

You can add a door or a window to this wall by clicking on Add objects button above.

This is a mass timber wall.

You can modify its length and position by dragging it in the canvas area, and by clicking on the Move or Edit button on this sidebar.

Dimensions you can set: length, thickness

You can add a door or a window to this wall by clicking on Add objects button above.

You can modify its fire properties by clicking on Fire property button on the sidebar.

Icon for a perimeter wall

A perimeter wall

Move mm inches .
Move mm inches .
Rotate degrees.
Change the length to mm inches and apply the change to the .
Ceiling Height mm inches .
Length: mm inches .
Width: mm inches .

This is the height of the column. By default, it is equal to the ceiling height or up to the bottom of a beam if it's under a beam. If the default is okay, leave the height boxes empty or "0". If you want to manually set the height of the column, input the height, below.

Height: mm inches .
Distance from the bottom: mm inches .
Depth: mm inches .
Thickness mm inches
Distance from ceiling ('0' means it is attached to the ceiling): mm inches .
Wall material .

Ceiling is exposed to fire by default.

Mass timber wall is exposed to fire by default on both sides.

To edit the fire property, choose a side that you want to edit, first.

2 sides of a mass timber wall

A beam is exposed to fire on all sides that are not touching either the ceiling or a perimeter wall.

To edit the fire property, choose a side that you want to edit, first. If a side cannot be chosen, it means the side is embedded in a wall so it is fire-protected already.

Sides of the beam labelled

A column is exposed to fire on all sides that are not touching either the ceiling or a perimeter wall.

To edit the fire property, choose a side that you want to edit, first. If a side cannot be chosen, it means the side is embedded in a wall or ceiling so it is fire-protected already.

Sides of the column labelled

A perimeter wall is exposed to fire on the side that is facing the suite.

Please set the ceiling height first.

What is the FSR (Flame Spread Rating) of this wall?

Choose which side you want to edit for its fire property. The selected side will be highlighted in the diagram on the right.

Is a part or all of this protected by encapsulation?

Select the area of encapsulation by clicking on the button, below:

You have completed this step.

You have an unsaved edit. Click on the Apply button to finalize the edit. If you want to discard this change, simply click on another tab or de-select this object from the drawing.

ID Type  

This is the suite.

To add a beam, column, mass timber wall, or lightframe wall: click on the Add objects button. Then, select the desired object to add to the suite.

To add a door or a window: CTRL + Click (or Command + Click on Mac) on a desired wall. Then, click on Add objects on the left sidebar and select the desired object.

This is a point at the end of a perimeter wall.

To move it: click on the button Move and adjust its position manually. Or, drag the point to where you want it to go.

This is a wall that encloses your suite.

You can move it by clicking on the Move button or edit its length and thickness by clicking on the Edit button.

This is the ceiling of the suite. You can modify the height of ceiling by clicking on Edit or modify its fire property by clicking on the Fire property button.

This is a door. You can modify its position by clicking on the Move button or its length and height by clicking on the Edit button.

This is a window. It could also represent an opening without glass. You can modify its position by clicking on the Move button above. You can also modify its length, height, or distance from the floor by clicking on the Edit button.

This is a beam. It is placed on the ceiling. You can modify its dimensions and position by dragging it in the canvas area, and by clicking on the Move or Edit button on this sidebar.

Dimensions you can set: length, width, depth.

You can modify its fire properties by clicking on Fire property button on the sidebar.

This is a column. It is placed on the floor and extends onto the ceiling by default. However, you can modify its height as you see fit.

You can modify its dimensions and position by dragging it in the canvas area, and by clicking on the Move or Edit button on this sidebar.

Dimensions you can set: length, width, height

You can modify its fire properties by clicking on Fire property button on the sidebar.

This is a lightframe wall. It is by default exposed to fire.

You can modify its length and position by dragging it in the canvas area, and by clicking on the Move or Edit button on this sidebar.

Dimensions you can set: length, thickness

You can add a door or a window to this wall by clicking on Add objects button above.

This is a mass timber wall.

You can modify its length and position by dragging it in the canvas area, and by clicking on the Move or Edit button on this sidebar.

Dimensions you can set: length, thickness

You can add a door or a window to this wall by clicking on Add objects button above.

You can modify its fire properties by clicking on Fire property button on the sidebar.

Icon for a point on the perimeter wall

A point on the perimeter wall

Move mm inches .
Move mm inches .
Rotate degrees.
Change the length to mm inches and apply the change to the .
Ceiling Height mm inches .
Length: mm inches .
Width: mm inches .

This is the height of the column. By default, it is equal to the ceiling height or up to the bottom of a beam if it's under a beam. If the default is okay, leave the height boxes empty or "0". If you want to manually set the height of the column, input the height, below.

Height: mm inches .
Distance from the bottom: mm inches .
Depth: mm inches .
Thickness mm inches
Distance from ceiling ('0' means it is attached to the ceiling): mm inches .
Wall material .

Ceiling is exposed to fire by default.

Mass timber wall is exposed to fire by default on both sides.

To edit the fire property, choose a side that you want to edit, first.

2 sides of a mass timber wall

A beam is exposed to fire on all sides that are not touching either the ceiling or a perimeter wall.

To edit the fire property, choose a side that you want to edit, first. If a side cannot be chosen, it means the side is embedded in a wall so it is fire-protected already.

Sides of the beam labelled

A column is exposed to fire on all sides that are not touching either the ceiling or a perimeter wall.

To edit the fire property, choose a side that you want to edit, first. If a side cannot be chosen, it means the side is embedded in a wall or ceiling so it is fire-protected already.

Sides of the column labelled

A perimeter wall is exposed to fire on the side that is facing the suite.

Please set the ceiling height first.

Choose which side you want to edit for its fire property. The selected side will be highlighted in the diagram on the right.

Is a part or all of this protected by encapsulation?

Select the area of encapsulation by clicking on the button, below:

You have completed this step.

You have an unsaved edit. Click on the Apply button to finalize the edit. If you want to discard this change, simply click on another tab or de-select this object from the drawing.

ID Type  

This is the suite.

To add a beam, column, mass timber wall, or lightframe wall: click on the Add objects button. Then, select the desired object to add to the suite.

To add a door or a window: CTRL + Click (or Command + Click on Mac) on a desired wall. Then, click on Add objects on the left sidebar and select the desired object.

This is a point at the end of a perimeter wall.

To move it: click on the button Move and adjust its position manually. Or, drag the point to where you want it to go.

This is a wall that encloses your suite.

You can move it by clicking on the Move button or edit its length and thickness by clicking on the Edit button.

This is the ceiling of the suite. You can modify the height of ceiling by clicking on Edit or modify its fire property by clicking on the Fire property button.

This is a door. You can modify its position by clicking on the Move button or its length and height by clicking on the Edit button.

This is a window. It could also represent an opening without glass. You can modify its position by clicking on the Move button above. You can also modify its length, height, or distance from the floor by clicking on the Edit button.

This is a beam. It is placed on the ceiling. You can modify its dimensions and position by dragging it in the canvas area, and by clicking on the Move or Edit button on this sidebar.

Dimensions you can set: length, width, depth.

You can modify its fire properties by clicking on Fire property button on the sidebar.

This is a column. It is placed on the floor and extends onto the ceiling by default. However, you can modify its height as you see fit.

You can modify its dimensions and position by dragging it in the canvas area, and by clicking on the Move or Edit button on this sidebar.

Dimensions you can set: length, width, height

You can modify its fire properties by clicking on Fire property button on the sidebar.

This is a lightframe wall. It is by default exposed to fire.

You can modify its length and position by dragging it in the canvas area, and by clicking on the Move or Edit button on this sidebar.

Dimensions you can set: length, thickness

You can add a door or a window to this wall by clicking on Add objects button above.

This is a mass timber wall.

You can modify its length and position by dragging it in the canvas area, and by clicking on the Move or Edit button on this sidebar.

Dimensions you can set: length, thickness

You can add a door or a window to this wall by clicking on Add objects button above.

You can modify its fire properties by clicking on Fire property button on the sidebar.

Icon for ceiling

Ceiling

Move mm inches .
Move mm inches .
Rotate degrees.
Change the length to mm inches and apply the change to the .
Ceiling Height mm inches .
Length: mm inches .
Width: mm inches .

This is the height of the column. By default, it is equal to the ceiling height or up to the bottom of a beam if it's under a beam. If the default is okay, leave the height boxes empty or "0". If you want to manually set the height of the column, input the height, below.

Height: mm inches .
Distance from the bottom: mm inches .
Depth: mm inches .
Thickness mm inches
Distance from ceiling ('0' means it is attached to the ceiling): mm inches .
Wall material .

Ceiling is exposed to fire by default.

Mass timber wall is exposed to fire by default on both sides.

To edit the fire property, choose a side that you want to edit, first.

2 sides of a mass timber wall

A beam is exposed to fire on all sides that are not touching either the ceiling or a perimeter wall.

To edit the fire property, choose a side that you want to edit, first. If a side cannot be chosen, it means the side is embedded in a wall so it is fire-protected already.

Sides of the beam labelled

A column is exposed to fire on all sides that are not touching either the ceiling or a perimeter wall.

To edit the fire property, choose a side that you want to edit, first. If a side cannot be chosen, it means the side is embedded in a wall or ceiling so it is fire-protected already.

Sides of the column labelled

A perimeter wall is exposed to fire on the side that is facing the suite.

Please set the ceiling height first.

What is the FSR (Flame Spread Rating) of the ceiling?

Choose which side you want to edit for its fire property. The selected side will be highlighted in the diagram on the right.

Is a part or all of this protected by encapsulation?

Select the area of encapsulation by clicking on the button, below:

You have completed this step.

You have an unsaved edit. Click on the Apply button to finalize the edit. If you want to discard this change, simply click on another tab or de-select this object from the drawing.

ID Type  

This is the suite.

To add a beam, column, mass timber wall, or lightframe wall: click on the Add objects button. Then, select the desired object to add to the suite.

To add a door or a window: CTRL + Click (or Command + Click on Mac) on a desired wall. Then, click on Add objects on the left sidebar and select the desired object.

This is a point at the end of a perimeter wall.

To move it: click on the button Move and adjust its position manually. Or, drag the point to where you want it to go.

This is a wall that encloses your suite.

You can move it by clicking on the Move button or edit its length and thickness by clicking on the Edit button.

This is the ceiling of the suite. You can modify the height of ceiling by clicking on Edit or modify its fire property by clicking on the Fire property button.

This is a door. You can modify its position by clicking on the Move button or its length and height by clicking on the Edit button.

This is a window. It could also represent an opening without glass. You can modify its position by clicking on the Move button above. You can also modify its length, height, or distance from the floor by clicking on the Edit button.

This is a beam. It is placed on the ceiling. You can modify its dimensions and position by dragging it in the canvas area, and by clicking on the Move or Edit button on this sidebar.

Dimensions you can set: length, width, depth.

You can modify its fire properties by clicking on Fire property button on the sidebar.

This is a column. It is placed on the floor and extends onto the ceiling by default. However, you can modify its height as you see fit.

You can modify its dimensions and position by dragging it in the canvas area, and by clicking on the Move or Edit button on this sidebar.

Dimensions you can set: length, width, height

You can modify its fire properties by clicking on Fire property button on the sidebar.

This is a lightframe wall. It is by default exposed to fire.

You can modify its length and position by dragging it in the canvas area, and by clicking on the Move or Edit button on this sidebar.

Dimensions you can set: length, thickness

You can add a door or a window to this wall by clicking on Add objects button above.

This is a mass timber wall.

You can modify its length and position by dragging it in the canvas area, and by clicking on the Move or Edit button on this sidebar.

Dimensions you can set: length, thickness

You can add a door or a window to this wall by clicking on Add objects button above.

You can modify its fire properties by clicking on Fire property button on the sidebar.

Icon for a door

A door

Move mm inches .
Move mm inches .
Rotate degrees.
Change the length to mm inches and apply the change to the .
Ceiling Height mm inches .
Length: mm inches .
Width: mm inches .

This is the height of the column. By default, it is equal to the ceiling height or up to the bottom of a beam if it's under a beam. If the default is okay, leave the height boxes empty or "0". If you want to manually set the height of the column, input the height, below.

Height: mm inches .
Distance from the bottom: mm inches .
Depth: mm inches .
Thickness mm inches
Distance from ceiling ('0' means it is attached to the ceiling): mm inches .
Wall material .

Ceiling is exposed to fire by default.

Mass timber wall is exposed to fire by default on both sides.

To edit the fire property, choose a side that you want to edit, first.

2 sides of a mass timber wall

A beam is exposed to fire on all sides that are not touching either the ceiling or a perimeter wall.

To edit the fire property, choose a side that you want to edit, first. If a side cannot be chosen, it means the side is embedded in a wall so it is fire-protected already.

Sides of the beam labelled

A column is exposed to fire on all sides that are not touching either the ceiling or a perimeter wall.

To edit the fire property, choose a side that you want to edit, first. If a side cannot be chosen, it means the side is embedded in a wall or ceiling so it is fire-protected already.

Sides of the column labelled

A perimeter wall is exposed to fire on the side that is facing the suite.

Please set the ceiling height first.

Choose which side you want to edit for its fire property. The selected side will be highlighted in the diagram on the right.

Is a part or all of this protected by encapsulation?

Select the area of encapsulation by clicking on the button, below:

You have completed this step.

You have an unsaved edit. Click on the Apply button to finalize the edit. If you want to discard this change, simply click on another tab or de-select this object from the drawing.

ID Type  

This is the suite.

To add a beam, column, mass timber wall, or lightframe wall: click on the Add objects button. Then, select the desired object to add to the suite.

To add a door or a window: CTRL + Click (or Command + Click on Mac) on a desired wall. Then, click on Add objects on the left sidebar and select the desired object.

This is a point at the end of a perimeter wall.

To move it: click on the button Move and adjust its position manually. Or, drag the point to where you want it to go.

This is a wall that encloses your suite.

You can move it by clicking on the Move button or edit its length and thickness by clicking on the Edit button.

This is the ceiling of the suite. You can modify the height of ceiling by clicking on Edit or modify its fire property by clicking on the Fire property button.

This is a door. You can modify its position by clicking on the Move button or its length and height by clicking on the Edit button.

This is a window. It could also represent an opening without glass. You can modify its position by clicking on the Move button above. You can also modify its length, height, or distance from the floor by clicking on the Edit button.

This is a beam. It is placed on the ceiling. You can modify its dimensions and position by dragging it in the canvas area, and by clicking on the Move or Edit button on this sidebar.

Dimensions you can set: length, width, depth.

You can modify its fire properties by clicking on Fire property button on the sidebar.

This is a column. It is placed on the floor and extends onto the ceiling by default. However, you can modify its height as you see fit.

You can modify its dimensions and position by dragging it in the canvas area, and by clicking on the Move or Edit button on this sidebar.

Dimensions you can set: length, width, height

You can modify its fire properties by clicking on Fire property button on the sidebar.

This is a lightframe wall. It is by default exposed to fire.

You can modify its length and position by dragging it in the canvas area, and by clicking on the Move or Edit button on this sidebar.

Dimensions you can set: length, thickness

You can add a door or a window to this wall by clicking on Add objects button above.

This is a mass timber wall.

You can modify its length and position by dragging it in the canvas area, and by clicking on the Move or Edit button on this sidebar.

Dimensions you can set: length, thickness

You can add a door or a window to this wall by clicking on Add objects button above.

You can modify its fire properties by clicking on Fire property button on the sidebar.

Icon for a window

A window

Move mm inches .
Move mm inches .
Rotate degrees.
Change the length to mm inches and apply the change to the .
Ceiling Height mm inches .
Length: mm inches .
Width: mm inches .

This is the height of the column. By default, it is equal to the ceiling height or up to the bottom of a beam if it's under a beam. If the default is okay, leave the height boxes empty or "0". If you want to manually set the height of the column, input the height, below.

Height: mm inches .
Distance from the bottom: mm inches .
Depth: mm inches .
Thickness mm inches
Distance from ceiling ('0' means it is attached to the ceiling): mm inches .
Wall material .

Ceiling is exposed to fire by default.

Mass timber wall is exposed to fire by default on both sides.

To edit the fire property, choose a side that you want to edit, first.

2 sides of a mass timber wall

A beam is exposed to fire on all sides that are not touching either the ceiling or a perimeter wall.

To edit the fire property, choose a side that you want to edit, first. If a side cannot be chosen, it means the side is embedded in a wall so it is fire-protected already.

Sides of the beam labelled

A column is exposed to fire on all sides that are not touching either the ceiling or a perimeter wall.

To edit the fire property, choose a side that you want to edit, first. If a side cannot be chosen, it means the side is embedded in a wall or ceiling so it is fire-protected already.

Sides of the column labelled

A perimeter wall is exposed to fire on the side that is facing the suite.

Please set the ceiling height first.

Choose which side you want to edit for its fire property. The selected side will be highlighted in the diagram on the right.

Is a part or all of this protected by encapsulation?

Select the area of encapsulation by clicking on the button, below:

You have completed this step.

You have an unsaved edit. Click on the Apply button to finalize the edit. If you want to discard this change, simply click on another tab or de-select this object from the drawing.

ID Type  

This is the suite.

To add a beam, column, mass timber wall, or lightframe wall: click on the Add objects button. Then, select the desired object to add to the suite.

To add a door or a window: CTRL + Click (or Command + Click on Mac) on a desired wall. Then, click on Add objects on the left sidebar and select the desired object.

This is a point at the end of a perimeter wall.

To move it: click on the button Move and adjust its position manually. Or, drag the point to where you want it to go.

This is a wall that encloses your suite.

You can move it by clicking on the Move button or edit its length and thickness by clicking on the Edit button.

This is the ceiling of the suite. You can modify the height of ceiling by clicking on Edit or modify its fire property by clicking on the Fire property button.

This is a door. You can modify its position by clicking on the Move button or its length and height by clicking on the Edit button.

This is a window. It could also represent an opening without glass. You can modify its position by clicking on the Move button above. You can also modify its length, height, or distance from the floor by clicking on the Edit button.

This is a beam. It is placed on the ceiling. You can modify its dimensions and position by dragging it in the canvas area, and by clicking on the Move or Edit button on this sidebar.

Dimensions you can set: length, width, depth.

You can modify its fire properties by clicking on Fire property button on the sidebar.

This is a column. It is placed on the floor and extends onto the ceiling by default. However, you can modify its height as you see fit.

You can modify its dimensions and position by dragging it in the canvas area, and by clicking on the Move or Edit button on this sidebar.

Dimensions you can set: length, width, height

You can modify its fire properties by clicking on Fire property button on the sidebar.

This is a lightframe wall. It is by default exposed to fire.

You can modify its length and position by dragging it in the canvas area, and by clicking on the Move or Edit button on this sidebar.

Dimensions you can set: length, thickness

You can add a door or a window to this wall by clicking on Add objects button above.

This is a mass timber wall.

You can modify its length and position by dragging it in the canvas area, and by clicking on the Move or Edit button on this sidebar.

Dimensions you can set: length, thickness

You can add a door or a window to this wall by clicking on Add objects button above.

You can modify its fire properties by clicking on Fire property button on the sidebar.

Icon for a beam

A beam

Move mm inches .
Move mm inches .
Rotate degrees.
Change the length to mm inches and apply the change to the .
Ceiling Height mm inches .
Length: mm inches .
Width: mm inches .

This is the height of the column. By default, it is equal to the ceiling height or up to the bottom of a beam if it's under a beam. If the default is okay, leave the height boxes empty or "0". If you want to manually set the height of the column, input the height, below.

Height: mm inches .
Distance from the bottom: mm inches .
Depth: mm inches .
Thickness mm inches
Distance from ceiling ('0' means it is attached to the ceiling): mm inches .
Wall material .

Ceiling is exposed to fire by default.

Mass timber wall is exposed to fire by default on both sides.

To edit the fire property, choose a side that you want to edit, first.

2 sides of a mass timber wall

A beam is exposed to fire on all sides that are not touching either the ceiling or a perimeter wall.

To edit the fire property, choose a side that you want to edit, first. If a side cannot be chosen, it means the side is embedded in a wall so it is fire-protected already.

Sides of the beam labelled

A column is exposed to fire on all sides that are not touching either the ceiling or a perimeter wall.

To edit the fire property, choose a side that you want to edit, first. If a side cannot be chosen, it means the side is embedded in a wall or ceiling so it is fire-protected already.

Sides of the column labelled

A perimeter wall is exposed to fire on the side that is facing the suite.

Please set the ceiling height first.

What is the FSR (Flame Spread Rating) of this beam?

Choose which side you want to edit for its fire property. The selected side will be highlighted in the diagram on the right.

Is a part or all of this protected by encapsulation?

Select the area of encapsulation by clicking on the button, below:

You have completed this step.

You have an unsaved edit. Click on the Apply button to finalize the edit. If you want to discard this change, simply click on another tab or de-select this object from the drawing.

ID Type  

This is the suite.

To add a beam, column, mass timber wall, or lightframe wall: click on the Add objects button. Then, select the desired object to add to the suite.

To add a door or a window: CTRL + Click (or Command + Click on Mac) on a desired wall. Then, click on Add objects on the left sidebar and select the desired object.

This is a point at the end of a perimeter wall.

To move it: click on the button Move and adjust its position manually. Or, drag the point to where you want it to go.

This is a wall that encloses your suite.

You can move it by clicking on the Move button or edit its length and thickness by clicking on the Edit button.

This is the ceiling of the suite. You can modify the height of ceiling by clicking on Edit or modify its fire property by clicking on the Fire property button.

This is a door. You can modify its position by clicking on the Move button or its length and height by clicking on the Edit button.

This is a window. It could also represent an opening without glass. You can modify its position by clicking on the Move button above. You can also modify its length, height, or distance from the floor by clicking on the Edit button.

This is a beam. It is placed on the ceiling. You can modify its dimensions and position by dragging it in the canvas area, and by clicking on the Move or Edit button on this sidebar.

Dimensions you can set: length, width, depth.

You can modify its fire properties by clicking on Fire property button on the sidebar.

This is a column. It is placed on the floor and extends onto the ceiling by default. However, you can modify its height as you see fit.

You can modify its dimensions and position by dragging it in the canvas area, and by clicking on the Move or Edit button on this sidebar.

Dimensions you can set: length, width, height

You can modify its fire properties by clicking on Fire property button on the sidebar.

This is a lightframe wall. It is by default exposed to fire.

You can modify its length and position by dragging it in the canvas area, and by clicking on the Move or Edit button on this sidebar.

Dimensions you can set: length, thickness

You can add a door or a window to this wall by clicking on Add objects button above.

This is a mass timber wall.

You can modify its length and position by dragging it in the canvas area, and by clicking on the Move or Edit button on this sidebar.

Dimensions you can set: length, thickness

You can add a door or a window to this wall by clicking on Add objects button above.

You can modify its fire properties by clicking on Fire property button on the sidebar.

Icon for a column

A column

Move mm inches .
Move mm inches .
Rotate degrees.
Change the length to mm inches and apply the change to the .
Ceiling Height mm inches .
Length: mm inches .
Width: mm inches .

This is the height of the column. By default, it is equal to the ceiling height or up to the bottom of a beam if it's under a beam. If the default is okay, leave the height boxes empty or "0". If you want to manually set the height of the column, input the height, below.

Height: mm inches .
Distance from the bottom: mm inches .
Depth: mm inches .
Thickness mm inches
Distance from ceiling ('0' means it is attached to the ceiling): mm inches .
Wall material .

Ceiling is exposed to fire by default.

Mass timber wall is exposed to fire by default on both sides.

To edit the fire property, choose a side that you want to edit, first.

2 sides of a mass timber wall

A beam is exposed to fire on all sides that are not touching either the ceiling or a perimeter wall.

To edit the fire property, choose a side that you want to edit, first. If a side cannot be chosen, it means the side is embedded in a wall so it is fire-protected already.

Sides of the beam labelled

A column is exposed to fire on all sides that are not touching either the ceiling or a perimeter wall.

To edit the fire property, choose a side that you want to edit, first. If a side cannot be chosen, it means the side is embedded in a wall or ceiling so it is fire-protected already.

Sides of the column labelled

A perimeter wall is exposed to fire on the side that is facing the suite.

Please set the ceiling height first.

What is the FSR (Flame Spread Rating) of this column?

Choose which side you want to edit for its fire property. The selected side will be highlighted in the diagram on the right.

Is a part or all of this protected by encapsulation?

Select the area of encapsulation by clicking on the button, below:

You have completed this step.

You have an unsaved edit. Click on the Apply button to finalize the edit. If you want to discard this change, simply click on another tab or de-select this object from the drawing.

ID Type  

This is the suite.

To add a beam, column, mass timber wall, or lightframe wall: click on the Add objects button. Then, select the desired object to add to the suite.

To add a door or a window: CTRL + Click (or Command + Click on Mac) on a desired wall. Then, click on Add objects on the left sidebar and select the desired object.

This is a point at the end of a perimeter wall.

To move it: click on the button Move and adjust its position manually. Or, drag the point to where you want it to go.

This is a wall that encloses your suite.

You can move it by clicking on the Move button or edit its length and thickness by clicking on the Edit button.

This is the ceiling of the suite. You can modify the height of ceiling by clicking on Edit or modify its fire property by clicking on the Fire property button.

This is a door. You can modify its position by clicking on the Move button or its length and height by clicking on the Edit button.

This is a window. It could also represent an opening without glass. You can modify its position by clicking on the Move button above. You can also modify its length, height, or distance from the floor by clicking on the Edit button.

This is a beam. It is placed on the ceiling. You can modify its dimensions and position by dragging it in the canvas area, and by clicking on the Move or Edit button on this sidebar.

Dimensions you can set: length, width, depth.

You can modify its fire properties by clicking on Fire property button on the sidebar.

This is a column. It is placed on the floor and extends onto the ceiling by default. However, you can modify its height as you see fit.

You can modify its dimensions and position by dragging it in the canvas area, and by clicking on the Move or Edit button on this sidebar.

Dimensions you can set: length, width, height

You can modify its fire properties by clicking on Fire property button on the sidebar.

This is a lightframe wall. It is by default exposed to fire.

You can modify its length and position by dragging it in the canvas area, and by clicking on the Move or Edit button on this sidebar.

Dimensions you can set: length, thickness

You can add a door or a window to this wall by clicking on Add objects button above.

This is a mass timber wall.

You can modify its length and position by dragging it in the canvas area, and by clicking on the Move or Edit button on this sidebar.

Dimensions you can set: length, thickness

You can add a door or a window to this wall by clicking on Add objects button above.

You can modify its fire properties by clicking on Fire property button on the sidebar.

Icon for a lightframe wall

A lightframe wall

Move mm inches .
Move mm inches .
Rotate degrees.
Change the length to mm inches and apply the change to the .
Ceiling Height mm inches .
Length: mm inches .
Width: mm inches .

This is the height of the column. By default, it is equal to the ceiling height or up to the bottom of a beam if it's under a beam. If the default is okay, leave the height boxes empty or "0". If you want to manually set the height of the column, input the height, below.

Height: mm inches .
Distance from the bottom: mm inches .
Depth: mm inches .
Thickness mm inches
Distance from ceiling ('0' means it is attached to the ceiling): mm inches .
Wall material .

Ceiling is exposed to fire by default.

Mass timber wall is exposed to fire by default on both sides.

To edit the fire property, choose a side that you want to edit, first.

2 sides of a mass timber wall

A beam is exposed to fire on all sides that are not touching either the ceiling or a perimeter wall.

To edit the fire property, choose a side that you want to edit, first. If a side cannot be chosen, it means the side is embedded in a wall so it is fire-protected already.

Sides of the beam labelled

A column is exposed to fire on all sides that are not touching either the ceiling or a perimeter wall.

To edit the fire property, choose a side that you want to edit, first. If a side cannot be chosen, it means the side is embedded in a wall or ceiling so it is fire-protected already.

Sides of the column labelled

A perimeter wall is exposed to fire on the side that is facing the suite.

Please set the ceiling height first.

Choose which side you want to edit for its fire property. The selected side will be highlighted in the diagram on the right.

Is a part or all of this protected by encapsulation?

Select the area of encapsulation by clicking on the button, below:

You have completed this step.

You have an unsaved edit. Click on the Apply button to finalize the edit. If you want to discard this change, simply click on another tab or de-select this object from the drawing.

ID Type  

This is the suite.

To add a beam, column, mass timber wall, or lightframe wall: click on the Add objects button. Then, select the desired object to add to the suite.

To add a door or a window: CTRL + Click (or Command + Click on Mac) on a desired wall. Then, click on Add objects on the left sidebar and select the desired object.

This is a point at the end of a perimeter wall.

To move it: click on the button Move and adjust its position manually. Or, drag the point to where you want it to go.

This is a wall that encloses your suite.

You can move it by clicking on the Move button or edit its length and thickness by clicking on the Edit button.

This is the ceiling of the suite. You can modify the height of ceiling by clicking on Edit or modify its fire property by clicking on the Fire property button.

This is a door. You can modify its position by clicking on the Move button or its length and height by clicking on the Edit button.

This is a window. It could also represent an opening without glass. You can modify its position by clicking on the Move button above. You can also modify its length, height, or distance from the floor by clicking on the Edit button.

This is a beam. It is placed on the ceiling. You can modify its dimensions and position by dragging it in the canvas area, and by clicking on the Move or Edit button on this sidebar.

Dimensions you can set: length, width, depth.

You can modify its fire properties by clicking on Fire property button on the sidebar.

This is a column. It is placed on the floor and extends onto the ceiling by default. However, you can modify its height as you see fit.

You can modify its dimensions and position by dragging it in the canvas area, and by clicking on the Move or Edit button on this sidebar.

Dimensions you can set: length, width, height

You can modify its fire properties by clicking on Fire property button on the sidebar.

This is a lightframe wall. It is by default exposed to fire.

You can modify its length and position by dragging it in the canvas area, and by clicking on the Move or Edit button on this sidebar.

Dimensions you can set: length, thickness

You can add a door or a window to this wall by clicking on Add objects button above.

This is a mass timber wall.

You can modify its length and position by dragging it in the canvas area, and by clicking on the Move or Edit button on this sidebar.

Dimensions you can set: length, thickness

You can add a door or a window to this wall by clicking on Add objects button above.

You can modify its fire properties by clicking on Fire property button on the sidebar.

Icon for a mass timber wall

A mass timber wall

Move mm inches .
Move mm inches .
Rotate degrees.
Change the length to mm inches and apply the change to the .
Ceiling Height mm inches .
Length: mm inches .
Width: mm inches .

This is the height of the column. By default, it is equal to the ceiling height or up to the bottom of a beam if it's under a beam. If the default is okay, leave the height boxes empty or "0". If you want to manually set the height of the column, input the height, below.

Height: mm inches .
Distance from the bottom: mm inches .
Depth: mm inches .
Thickness mm inches
Distance from ceiling ('0' means it is attached to the ceiling): mm inches .
Wall material .

Ceiling is exposed to fire by default.

Mass timber wall is exposed to fire by default on both sides.

To edit the fire property, choose a side that you want to edit, first.

2 sides of a mass timber wall

A beam is exposed to fire on all sides that are not touching either the ceiling or a perimeter wall.

To edit the fire property, choose a side that you want to edit, first. If a side cannot be chosen, it means the side is embedded in a wall so it is fire-protected already.

Sides of the beam labelled

A column is exposed to fire on all sides that are not touching either the ceiling or a perimeter wall.

To edit the fire property, choose a side that you want to edit, first. If a side cannot be chosen, it means the side is embedded in a wall or ceiling so it is fire-protected already.

Sides of the column labelled

A perimeter wall is exposed to fire on the side that is facing the suite.

Please set the ceiling height first.

What is the FSR (Flame Spread Rating) of this wall?

Choose which side you want to edit for its fire property. The selected side will be highlighted in the diagram on the right.

Is a part or all of this protected by encapsulation?

Select the area of encapsulation by clicking on the button, below:

You have completed this step.

You have an unsaved edit. Click on the Apply button to finalize the edit. If you want to discard this change, simply click on another tab or de-select this object from the drawing.

ID Type  

This is the suite.

To add a beam, column, mass timber wall, or lightframe wall: click on the Add objects button. Then, select the desired object to add to the suite.

To add a door or a window: CTRL + Click (or Command + Click on Mac) on a desired wall. Then, click on Add objects on the left sidebar and select the desired object.

This is a point at the end of a perimeter wall.

To move it: click on the button Move and adjust its position manually. Or, drag the point to where you want it to go.

This is a wall that encloses your suite.

You can move it by clicking on the Move button or edit its length and thickness by clicking on the Edit button.

This is the ceiling of the suite. You can modify the height of ceiling by clicking on Edit or modify its fire property by clicking on the Fire property button.

This is a door. You can modify its position by clicking on the Move button or its length and height by clicking on the Edit button.

This is a window. It could also represent an opening without glass. You can modify its position by clicking on the Move button above. You can also modify its length, height, or distance from the floor by clicking on the Edit button.

This is a beam. It is placed on the ceiling. You can modify its dimensions and position by dragging it in the canvas area, and by clicking on the Move or Edit button on this sidebar.

Dimensions you can set: length, width, depth.

You can modify its fire properties by clicking on Fire property button on the sidebar.

This is a column. It is placed on the floor and extends onto the ceiling by default. However, you can modify its height as you see fit.

You can modify its dimensions and position by dragging it in the canvas area, and by clicking on the Move or Edit button on this sidebar.

Dimensions you can set: length, width, height

You can modify its fire properties by clicking on Fire property button on the sidebar.

This is a lightframe wall. It is by default exposed to fire.

You can modify its length and position by dragging it in the canvas area, and by clicking on the Move or Edit button on this sidebar.

Dimensions you can set: length, thickness

You can add a door or a window to this wall by clicking on Add objects button above.

This is a mass timber wall.

You can modify its length and position by dragging it in the canvas area, and by clicking on the Move or Edit button on this sidebar.

Dimensions you can set: length, thickness

You can add a door or a window to this wall by clicking on Add objects button above.

You can modify its fire properties by clicking on Fire property button on the sidebar.

Exposed Mass Timber Calculator

The Exposed Mass Timber Calculator is designed to help users determine if their encapsulated mass timber construction (EMTC) compartment designs are code-compliant with the 2025 edition of the National Building Code of Canada (NBC). This tool evaluates the necessary dimensions of mass timber elements and the permissible percentages of exposed mass timber elements, including beams, columns, walls, and ceilings within suites and fire compartments.

Is this a Suite or a Fire Compartment as defined by the 2025 edition of the National Building Code of Canada (NBC)?

Do you prefer to use millimetres (mm) or inches (in) for your measurements?

(Please note that once you choose a measurement unit, you won't be able to switch between millimetres and inches later due to potential conversion errors.)

Click on an object while holding down the CTRL key (COMMAND key on Mac) to select the object.

100%

Here's your result

The following result shows whether your suite is code-compliant. The aspects that are code compliant are in the green box. The aspects that are not code compliant are in the red box. In addition, any additional notes are shown at the bottom.


Want to change some parameters? Simply go back to any of the previous steps and adjust your settings.

A server error occurred and the result could not be fetched. Please try again later.

The following is the general mass timber size requirements results

  Code-Compliant Not Code-Compliant
Beams and columns that have 2- or 3-sided fire exposure
Beams and columns that have 4-sided fire exposure
Walls that have 1-sided fire exposure
Walls that have 2-sided fire exposure
Ceiling

The following is the fire properties results

Your suite is code-compliant

These aspects are not code compliant

Additional warning

Additional notes