Environmental product declarations (EPDs) – Copy
EPD Link An Industry Average EPD for Canadian Pre-fabricated Wood I-Joists • View Resource A Regionalized Industry Average EPD for Canadian Softwood Lumber • View Resource A Regionalized Industry Average EPD for Canadian Oriented Strand Board • View Resource An Industry Average EPD for Canadian Softwood Plywood • View Resource A Regionalized Industry Average EPD for Canadian Wood Trusses • View Resource Stakeholders within the building design and construction community are increasingly being asked to include information in their decision-making processes that take into consideration potential environmental impacts. These stakeholders and interested parties expect unbiased product information that is consistent with current best practices and based on objective scientific analysis. In the future, building product purchasing decisions will likely require the type of environmental information provided by environmental product declarations (EPDs). In addition, green building rating systems, including LEED®, Green Globes™ and BREEAM®, recognize the value of EPDs for the assessment of potential environmental impacts of building products. EPDs are concise, standardized, and third-party verified reports that describe the environmental performance of a product or a service. EPDs are able to identify and quantify the potential environmental impacts of a product or service throughout the various stages of its life cycle (resource extraction or harvest, processing, manufacturing, transportation, use, and end-of-life). EPDs, also known as Type III environmental product declarations, provide quantified environmental data using predetermined parameters that are based on internationally standardized approaches. EPDs for building products can help architects, designers, specifiers, and other purchasers better understand a product’s potential environmental impacts and sustainability attributes. An EPD is a disclosure by a company or industry to make public the environmental data related to one or more of its products. EPDs are intended to help purchasers better understand a product’s environmental attributes in order for specifiers to make more informed decisions selecting products. The function of EPDs are somewhat analogous to nutrition labels on food packaging; their purpose is to clearly communicate, to the user, environmental data about products in a standardized format. EPDs are information carriers that are intended to be a simple and user-friendly mechanism to disclose potential environmental impact information about a product within the marketplace. EPDs do not rank products or compare products to baselines or benchmarks. An EPD does not indicate whether or not certain environmental performance criteria have been met and does not address social and economic impacts of construction products. Data reported in an EPD is collected using life cycle assessment (LCA), an internationally standardized scientific methodology. LCAs involve compiling an inventory of relevant energy and material inputs and environmental releases, and evaluating their potential impacts. It is also possible for EPDs to convey additional environmental information about a product that is outside the scope of LCA. EPDs are primarily intended for business-to-business communication, although they can also be used for business-to-consumer communication. EPDs are developed based on the results of a life cycle assessment (LCA) study and must be compliant with the relevant product category rules (PCR), which are developed by a registered program operator. The PCR establishes the specific rules, requirements and guidelines for conducting an LCA and developing an EPD for one or more product categories. The North American wood products industry has developed several industry wide EPDs, applicable to all the wood product manufacturers located across North America. These industry wide EPDs have obtained third-party verification from the Underwriters Laboratories Environment (ULE), an independent certification body. North American wood product EPDs provide industry average data for the following environmental metrics: Global warming potential; Acidification potential; Eutrophication potential; Ozone depletion potential; Smog potential; Primary energy consumption; Material resources consumption; and Non-hazardous waste generation. Industry wide EPDs for wood products are business-to-business EPDs, covering a cradle-to-gate scope; from raw material harvest until the finished product is ready to leave the manufacturing facility. Due to the multitude of uses for wood products, the potential environmental impacts related to the delivery of the product to the customer, the use of the product, and the eventual end-of-life processes are excluded from the analysis. For further information, refer to the following resources: ISO 21930 Sustainability in buildings and civil engineering works – Core rules for environmental product declarations of construction products and services ISO 14025 Environmental labels and declarations – Type III environmental declarations – Principles and procedures ISO/TS 14027 Environmental labels and declarations – Development of product category rules ISO 14040 Environmental management – Life cycle assessment – Principles and framework ISO 14044 Environmental management – Life cycle assessment – Requirements and guidelines American Wood Council Canada Green Building Council Green Globes BREEAM® Annual Review Rules and Form EPD
Treatment during engineered wood product manufacture
Some engineered wood panel products, such as plywood and laminated veneer lumber (LVL) are able to be treated after manufacture with preservative solutions, whereas thin strand based products (OSB, OSL) and small particulate and fibre-based panels (particleboard, MDF) are not. The preservatives must be added to the wood elements before they are bonded together, either as a spray on, mist or powder. Products such as OSB are manufactured from small, thin strands of wood. Powdered preservatives can be mixed in with the strands and resins during the blending process just prior to mat forming and pressing. Zinc borate is commonly used in this application. By adding preservatives to the manufacturing process it’s possible to obtain uniform treatment throughout the thickness of the product. In North America, plywood is normally protected against decay and termites by pressure treatment processes. However, in other parts of the world insecticides are often formulated with adhesives to protect plywood against termites.
Durability
Throughout history, wherever wood has been available as a resource, it has found favour as a building material for its durability, strength, cost-competitiveness, ease-of-use, sustainability, and beauty. Wood-frame and timber buildings have an established record of long-term durability. From the ancient temples of China and Japan built in the 1000s, and the great stave churches of Norway to the numerous North American buildings built in the 1800s, wood construction has proven it can stand the test of time. Although wood building technology has been changing over time, wood’s natural durability properties will continue to make it the material of choice. This website helps designers, construction professionals, and building owners understand what durability hazards exist for wood, and describes durability solutions that ensure wood, as a building material, will perform well for decades, and even centuries, to come. Durability Guidelines Wood structures, properly designed and properly treated, will last indefinitely. This section includes guidance on specific applications of structures that have constant exposure to the elements. Mass timber exteriors Modern Mass Timber Construction includes building systems otherwise known as post-and-beam, or heavy-timber, and cross laminated timber (CLT). Typical components include solid sawn timbers, glue-laminated timbers (glulam), parallel strand lumber (PSL) laminated veneer lumber (LVL) laminated strand (LSL), and CLT. Heavy-timber post and beam with infill walls of various materials is one of the oldest construction systems known to man. Historic examples still standing range from Europe through Asia to the long-houses of the Pacific Coastal first nations. Ancient temples in Japan and China dating back thousands of years are basically heavy timber construction with some components semi-exposed to the weather. Heavy-timber-frame warehouses with masonry walls dating back 100 years or more are still serviceable and sought-after as residences or office buildings in cities like Toronto, Montreal and Vancouver (Koo 2013). Besides their historic value, these old warehouses offer visually impressive wood structures, open plan floors and resultant flexibility of use and repurposing. Building on this legacy, modern mass timber construction is becoming increasingly popular in parts of Canada and the USA for non-residential construction, recreational properties and even multi-unit residential buildings. Owners and architects typically see a need to express these structural materials, particularly glulam, on the exterior of the building where they are at semi-exposed to the elements. In addition wood components are being increasingly used to soften the exterior look of non-wood buildings and make them more appealing. They are anticipated to remain structurally sound and visually appealing for the service life. However, putting wood outside creates a risk of deterioration that needs to be managed. Similar to wood used for landscaping, the major challenges to wood in these situations are decay, weathering and black-stain fungi. This document provides assistance to architects and specifiers in making the right decisions to maximize the durability and minimize maintenance requirements for glulam and other mass timber on the outside of residential and non-residential buildings. It focusses on general principles, rather than providing detailed recommendations. This is primarily focussed on a Canadian and secondarily on a North American audience. Click here to read more Disaster Relief Housing Shelter needs after natural disasters come in three phases: Immediate shelter: normally supplied by tarpaulins or light tentsTransition shelter: may be heavy-duty tents or more robust medium-term shelters.Permanent buildings: Ultimately permanent shelters need to be constructed when the local economy recovers. Immediate and transition shelters are typically supplied by aid agencies. Light wood frame is ideal for rapid provision of medium- to long-term shelter after natural disasters. However, there are challenges in certain climates for wood frame construction that must be addressed in order to sustainably and responsibly build them. For example, many of the regions which experience hurricanes, earthquakes and tsunamis also have severe decay and termite hazards including aggressive Coptotermes species and drywood termites. In extreme northern climates, high occupancy loads are common and when combined with the need for substantial thermal insulation to ensure comfortable indoor temperatures, can result in condensation and mould growth if wall and roof systems are not carefully designed. The desire of aid organizations to maximize the number of shelters delivered tends to drive down the allowable cost dictating simplified designs with fewer moisture management features. It may also be difficult to control the quality of construction in some regions. Once built, “temporary” structures are commonly used for much longer than their design life. Occupier improvements over the longer term can potentially increase moisture and termite problems. All of these factors mean that the wood used needs to be durable. One method of achieving more durable wood products is by treating the wood to prevent decay and insect/termite attack. However, commonly available preservative treated wood in Canada may not be suitable for use in other countries. Selection of the preservative and treatment process must take into account the regulations in both the exporting and receiving countries, including consideration of the potential for human contact with the preserved wood, where the product will be within the building design, the treatability of wood species, and the local decay and termite hazard. Simple design features, such as ensuring wood does not come into contact with the ground and is protected from rain, can reduce moisture and termite problems. Building with concrete and steel does not eliminate termite problems. Termites will happily forage in a concrete or masonry block buildings looking for wood components, furniture, cupboards, and other cellulosic materials, such as the paper on drywall, cardboard boxes, books etc. Mud tubes running 10ft over concrete foundations to reach cellulosic building materials have been documented. Indeed, termites have caused major economic damage to cellulosic building materials even in concrete and steel high-rises in Florida and in southern China. Timber bridges Timber bridges are an excellent way to showcase the strength and durability of wood structures, even under harsh conditions, when material selection, design, construction and maintenance are done well. They could also be critical infrastructure elements that span fast rivers or deep gorges. Consequences of failure of these structures can be severe
Bâtiments
Types de murs permettant de contrôler l’eau En règle générale, les experts en enveloppes de bâtiment considèrent qu’il existe trois ou quatre approches différentes pour la conception de murs au profit du contrôle de l’humidité. Les murs avec barrière d’étanchéité en surface sont conçus de façon à obtenir une étanchéité à l’eau et à l’air à la surface du parement. Un exemple de ceci serait le stuc appliqué directement sur le revêtement ou la maçonnerie, sans membrane d’étanchéité comme le papier de construction. Les joints entre le parement et les interfaces, et les autres composants, sont scellés afin d’assurer la continuité. La face extérieure du parement est la principale et unique voie d’évacuation de l’eau. Il n’y a pas de renfort pour le contrôle de l’humidité, c.-à-d. qu’il n’y a pas de système complémentaire. Un système d’étanchéisation en surface doit être construit et maintenu en parfaite condition afin de contrôler efficacement l’infiltration de l’eau de pluie. En général, ces murs sont recommandés uniquement dans les situations où les risques sont faibles, comme les zones murales situées sous de larges avant-toits ou là où le climat est sec. Les murs dotés d’une membrane dissimulée sont conçus dans la perspective où il est possible qu’un peu d’eau s’infiltre au-delà de la surface du parement. L’intérieur de ces murs comporte un dispositif d’évacuation de l’eau, en guise de deuxième ligne de défense contre l’eau de pluie. La face du parement reste la voie d’évacuation principale, mais une évacuation secondaire est exécutée à l’intérieur du mur. Le dispositif de drainage se compose d’une membrane comme du papier de construction, qui achemine l’eau jusqu’en bas et à l’extérieur du mur. Un bardage ou du stuc appliqué sur du papier de construction constitue un exemple d’un tel dispositif. Les murs comptant une membrane dissimulée sont appropriés aux endroits modérément exposés à la pluie et au vent. Les murs à écran pare-pluie vont un pas plus loin dans le contrôle de l’eau, en incorporant une cavité entre le dos du parement et le papier de construction. Le vide d’air ventile le dos du parement et l’aide à s’assécher. De plus, la cavité fait office de coupure capillaire entre le parement et le papier de construction, empêchant ainsi la majeure partie de l’eau d’entrer en contact avec le papier. Un mur avec stuc ou parement appliqué sur la fourrure verticale par-dessus le papier de construction constitue un bon exemple de mur à écran pare-pluie. De tels murs conviennent à des bâtiments fortement exposés à la pluie et au vent. L’écran pare-pluie à pression équilibrée constitue l’un des progrès de la technologie des écrans pare-pluie. Ces murs font appel à des orifices pour équilibrer la pression entre l’air extérieur et celui de la cavité, éliminant ainsi l’une des forces favorisant la pénétration de l’eau (lorsque celle-ci est poussée au travers des fissures en raison de la pression élevée à la surface du mur et de la pression basse dans la cavité). Ces murs sont réservés aux endroits où les risques d’exposition sont très élevés. Importance des avant-toits Lorsque le climat est pluvieux, un avant-toit constitue l’un des moyens les plus simples et efficaces de réduire le risque d’infiltration de l’eau. Un avant-toit peut être comparé à un parapluie pour les murs, et plus il est large, mieux c’est. Une étude sur les bâtiments aux prises avec des problèmes de fuites en Colombie-Britannique, demandée par la Société canadienne d’hypothèques et de logement en 1996, a démontré la forte corrélation inverse entre la largeur d’un avant-toit et le pourcentage de murs problématiques. Par contre, même un avant-toit étroit peut aider à protéger le mur, en grande partie en raison de son effet sur la pluie battante. L’un des avantages importants mésestimés des avant-toits et des toits à double pente est leur effet sur la pression du vent. En règle générale, la pluie poussée par le vent est la plus grande source d’humidité dans les murs. Un avant-toit ou une toiture inclinée aidera à rediriger le vent vers le haut et par-dessus le bâtiment, réduisant ainsi la pression sur le mur et, par conséquent, force de la pluie battante qui martèle le mur. L’eau sera donc moins susceptible d’être poussée par le vent dans les fissures du mur. Minimiser les orifices La grande majorité des problèmes causés par l’eau pluviale est attribuable à l’eau qui s’infiltre par les trous des murs. Si aucune mesure n’est prise pour remédier aux irrégularités de l’enveloppe, l’eau pourra s’infiltrer par exemple autour des cadrages de fenêtres et du conduit d’évacuation de la sécheuse, aux intersections comme les balcons et les parapets, et aux joints du papier de construction. Une conception détaillée et une construction soigneuse sont donc essentielles! Tout comme l’est l’entretien des éléments d’étanchéité de courte durée, comme le mastic de calfeutrage autour des cadrages de fenêtres. Le BC Housing-Homeowner Protection Office a mis à jour le « Best Practice Guide for Wood-Frame Envelopes in the Coastal Climate of British Columbia », initialement conçu par la Société canadienne d’hypothèques et de logement, et a publié le « Building Enclosure Design Guide for Wood-Frame Multi-Unit Residential Buildings », qui comprend des renseignements exhaustifs sur la conception et la construction. Utilisez notre calculatrice de résistance effective non seulement pour établir la résistance thermique des murs, mais également pour procéder à une évaluation de leur durabilité en fonction des conditions climatiques représentatives à l’échelle du Canada. Publications associées Pour obtenir des conseils en ligne sur la conception et la construction, consultez ce qui suit : Le programme « Build a Better Home », dirigé par l’APA – The Engineered Wood Association, anime des cours de formation, présente des maisons témoins et offre des publications. Le site Web fournit des renseignements sur la construction, de même que des liens vers toutes les publications pertinentes de l’APA. Building Enclosure Design Guide Guide: Wood-Frame Multi-Unit Residential Buildings.
Environmental Issues

Safe Handling Using common sense and standard safety equipment (personal protection and wood-working machinery) applies when working with any building products. Gloves, dust masks and goggles are appropriate for use with all woodworking. Here are a few key points specific to treated wood: Pressure-treated wood is not a pesticide, and it is not a hazardous product. In most municipalities, you may dispose of treated wood by ordinary garbage collection. However, you should check with your local regulations. Never burn treated wood because toxic chemicals may be produced as part of the smoke and ashes. If preservatives or sawdust accumulate on clothes, launder before reuse. Wash your work clothes separately from other household clothing. Treated wood used for patios, decks and walkways should be free of surface preservative residues. Treated wood should not be used for compost heaps where free organic acids produced early in the composting process can remove the fixed chemicals. It is, however, safe to use for growing vegetables in raised soil beds. If, after reading this, you are still concerned, place a layer of plastic sheet between the soil and the treated wood wall. Treated wood should not be cleaned with harsh reducing agents since these can also remove the fixed chemicals. Environmental Concerns All wood preservatives used in the U.S. and Canada are registered and regularly re-examined for safety by the U.S. Environmental Protection Agency and Health Canada’s Pest Management and Regulatory Agency, respectively. Wood preservation is not an exact science, due to the biological – and therefore variable and unpredictable – nature of both wood and the organisms that destroy it. Wood scientists are trying to understand more about how wood decays to ensure that durability is achieved through smart design and construction choices where possible, so that as a society we can be selective in our use of preservatives. Comparing treated wood to alternative products A series of life cycle assessments has been completed comparing preservative treated wood to alternative products. In most cases, the treated wood products had lower environmental impacts. Click for consumer safety information on handling treated wood (Canada). Read More
Treated Wood
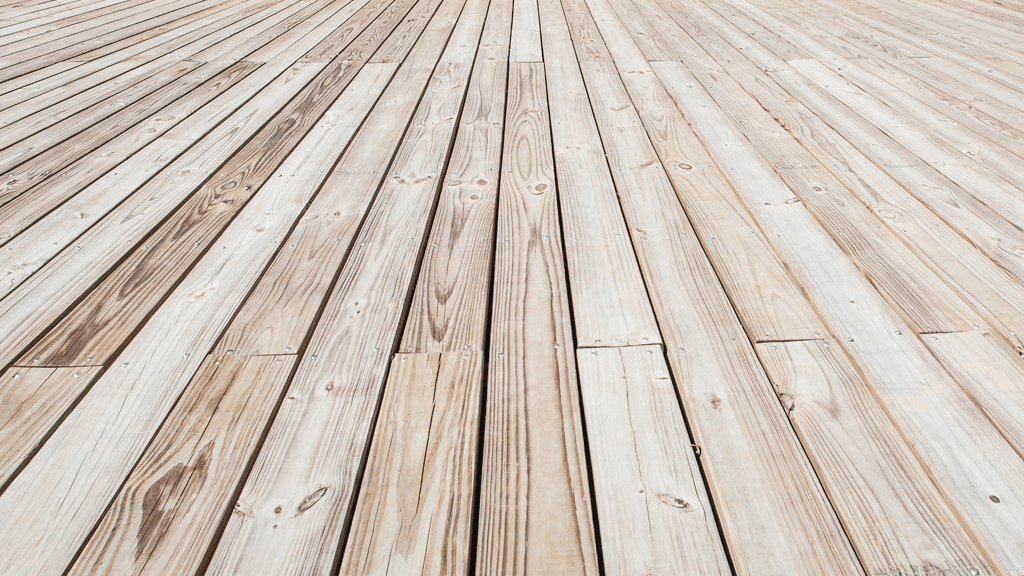
When you want to use wood that is not naturally decay resistant in a wet application (outdoors, for example) or where it may be at risk for insect attack, you need to specify preservative-treated wood. This is lumber that has been chemically treated to make it unattractive to fungi and other pests. In the same way that you would specify galvanized steel where it would be at risk of rusting, you specify treated wood where it will be used in a setting conducive to decay. Wood does not deteriorate just because it gets wet. When wood breaks down, it is because an organism is eating it as food. Preservatives work by making the food source inedible to these organisms. Properly preservative-treated wood can have 5 to 10 times the service life of untreated wood. This extension of life saves the equivalent of 12.5% of Canada’s annual log harvest. Preserved wood is used most often for railroad ties, utility poles, marine piles, decks, fences and other outdoor applications. Various treatment methods and types of chemicals are available, depending on the attributes required in the particular application and the level of protection needed.
Environmental product declarations (EPDs)

EPD Link An Industry Average EPD for Canadian Pre-fabricated Wood I-Joists A Regionalized Industry Average EPD for Canadian Softwood Lumber A Regionalized Industry Average EPD for Canadian Oriented Strand Board An Industry Average EPD for Canadian Softwood Plywood A Regionalized Industry Average EPD for Canadian Wood Trusses Stakeholders within the building design and construction community are increasingly being asked to include information in their decision-making processes that take into consideration potential environmental impacts. These stakeholders and interested parties expect unbiased product information that is consistent with current best practices and based on objective scientific analysis. In the future, building product purchasing decisions will likely require the type of environmental information provided by environmental product declarations (EPDs). In addition, green building rating systems, including LEED®, Green Globes™ and BREEAM®, recognize the value of EPDs for the assessment of potential environmental impacts of building products. EPDs are concise, standardized, and third-party verified reports that describe the environmental performance of a product or a service. EPDs are able to identify and quantify the potential environmental impacts of a product or service throughout the various stages of its life cycle (resource extraction or harvest, processing, manufacturing, transportation, use, and end-of-life). EPDs, also known as Type III environmental product declarations, provide quantified environmental data using predetermined parameters that are based on internationally standardized approaches. EPDs for building products can help architects, designers, specifiers, and other purchasers better understand a product’s potential environmental impacts and sustainability attributes. An EPD is a disclosure by a company or industry to make public the environmental data related to one or more of its products. EPDs are intended to help purchasers better understand a product’s environmental attributes in order for specifiers to make more informed decisions selecting products. The function of EPDs are somewhat analogous to nutrition labels on food packaging; their purpose is to clearly communicate, to the user, environmental data about products in a standardized format. EPDs are information carriers that are intended to be a simple and user-friendly mechanism to disclose potential environmental impact information about a product within the marketplace. EPDs do not rank products or compare products to baselines or benchmarks. An EPD does not indicate whether or not certain environmental performance criteria have been met and does not address social and economic impacts of construction products. Data reported in an EPD is collected using life cycle assessment (LCA), an internationally standardized scientific methodology. LCAs involve compiling an inventory of relevant energy and material inputs and environmental releases, and evaluating their potential impacts. It is also possible for EPDs to convey additional environmental information about a product that is outside the scope of LCA. EPDs are primarily intended for business-to-business communication, although they can also be used for business-to-consumer communication. EPDs are developed based on the results of a life cycle assessment (LCA) study and must be compliant with the relevant product category rules (PCR), which are developed by a registered program operator. The PCR establishes the specific rules, requirements and guidelines for conducting an LCA and developing an EPD for one or more product categories. The North American wood products industry has developed several industry wide EPDs, applicable to all the wood product manufacturers located across North America. These industry wide EPDs have obtained third-party verification from the Underwriters Laboratories Environment (ULE), an independent certification body. North American wood product EPDs provide industry average data for the following environmental metrics: Global warming potential; Acidification potential; Eutrophication potential; Ozone depletion potential; Smog potential; Primary energy consumption; Material resources consumption; and Non-hazardous waste generation. Industry wide EPDs for wood products are business-to-business EPDs, covering a cradle-to-gate scope; from raw material harvest until the finished product is ready to leave the manufacturing facility. Due to the multitude of uses for wood products, the potential environmental impacts related to the delivery of the product to the customer, the use of the product, and the eventual end-of-life processes are excluded from the analysis. For further information, refer to the following resources: ISO 21930 Sustainability in buildings and civil engineering works – Core rules for environmental product declarations of construction products and services ISO 14025 Environmental labels and declarations – Type III environmental declarations – Principles and procedures ISO/TS 14027 Environmental labels and declarations – Development of product category rules ISO 14040 Environmental management – Life cycle assessment – Principles and framework ISO 14044 Environmental management – Life cycle assessment – Requirements and guidelines American Wood Council Canada Green Building Council Green Globes BREEAM® Annual Review Rules and Form EPD
Buildings

Wall Types for Water Control Building envelope experts generally speak of three or four different approaches to design of a wall for moisture control. Face seal walls are designed to achieve water tightness and air tightness at the face of the cladding. An example would be stucco applied directly to sheathing or masonry without a moisture barrier membrane such as building paper. Joints in the cladding and interfaces with other wall components are sealed to provide continuity. The exterior face of the cladding is the primary – and only – drainage path. There is no moisture control redundancy, i.e., there is no back-up system. A face seal system must be constructed and maintained in perfect condition to effectively control rain water intrusion. In general, these walls are only recommended in low risk situations, such as wall areas under deep overhangs or in dry climates. Concealed barrier walls are designed with an acceptance that some water may pass beyond the surface of the cladding. These walls incorporate a drainage plane within the wall assembly, as a second line of defense against rain water. The face of the cladding remains the primary drainage path, but secondary drainage is accomplished within the wall. This drainage plane consists of a membrane such as building paper, which carries water down and out of the wall assembly. An example is siding or stucco applied over building paper. Concealed barrier walls are appropriate in areas of low to moderate exposure to rain and wind. Rainscreen walls take water management one step further by incorporating a cavity between the back of the cladding and the building paper. This airspace ventilates the back of the cladding, helping it to dry out. The cavity also acts as a capillary break between cladding and building paper, thereby keeping most water from making contact with the building paper. An example of a rainscreen wall is stucco or siding applied to vertical strapping over the building paper. Rainscreen walls are appropriate in high rain and wind exposures. An advancement of the rainscreen technology is the pressure-equalized rainscreen. These walls use vents to equalize the pressure between the exterior and the cavity air, thereby removing one of the driving forces for water penetration (when it is pushed through cracks due to high pressure on the face of the wall and low pressure in the cavity). These walls are for very high risk exposures. Importance of an Overhang In a rainy climate, an overhang is one of the simplest and most effective ways to reduce the risk of water intrusion. An overhang is an umbrella for the wall, and the deeper the better. A survey of leaky buildings in British Columbia commissioned by Canada Mortgage and Housing Corporation in 1996 showed a strong inverse correlation between depth of overhang and percent of walls with problems. However, even a small overhang can help protect the wall, largely due to its effect on driving rain. One important benefit of overhangs and peaked roofs often not appreciated is the effect of these elements on wind pressure. Wind-driven rain is typically the largest source of moisture for walls. An overhang and/or sloped roof will help direct the wind up and over the building, which reduces the pressure on the wall and thereby reduces the force of the driving rain striking the wall. This means water is less likely to be pushed by wind through cracks in the wall. Minimize the Holes Most rainwater problems are due to water leaking into the wall through holes. If care isn’t taken to protect discontinuities in the envelope, water can leak around window framing and dryer vents, at intersections like balconies and parapets, and at building paper joints, for example. Good design detailing and careful construction is critical! So is maintenance of short-life sealants like caulk around window frames. BC Housing-Homeowner Protection Office has updated the “Best Practice Guide for Wood-Frame Envelopes in the Coastal Climate of British Columbia” originally developed by Canada Mortgage and Housing Corporation and published “Building Enclosure Design Guide for Wood-Frame Multi-Unit Residential Buildings” with extensive information on design and construction detailing. Use our Effective R calculator to determine not only the thermal resistance of walls, but also a durability assessment of the wall based on representative climate conditions across Canada. Related Publications For on-line design and construction tips, try the following:The Build a Better Home program, operated by APA-The Engineered Wood Association, runs training courses, operates a demonstration houses, and offers publications. The web site offers construction information and provides links to all relevant APA publications. Building Enclosure Design Guide: Wood-Frame Multi-Unit Residential Buildings.
Assessing and Restoration of Decay
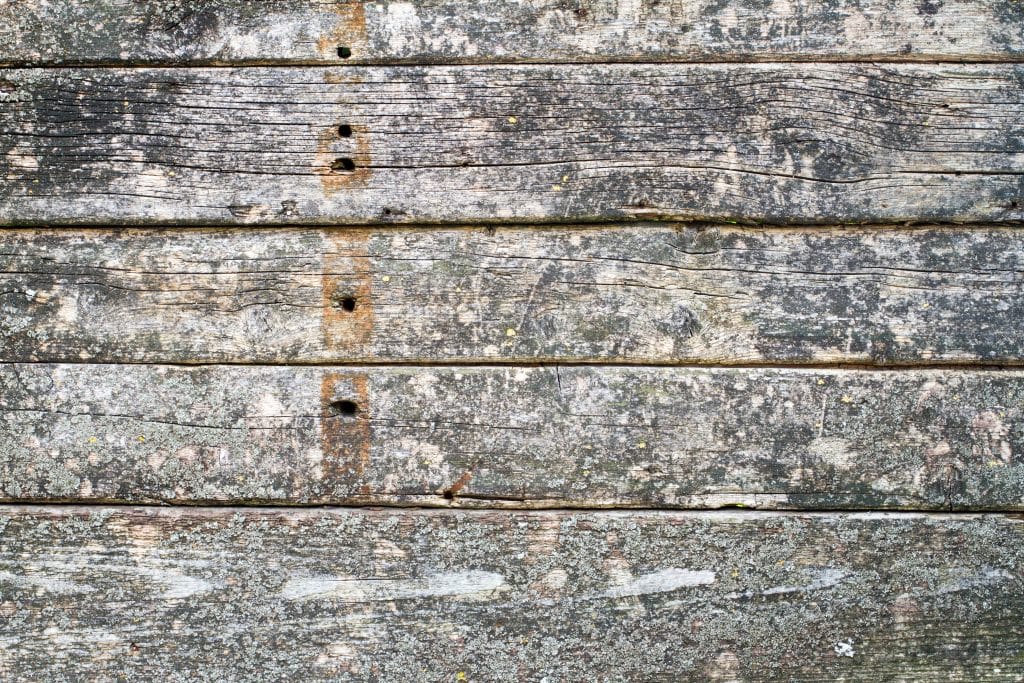
Sometimes it happens – wood in service suffers from decay. How can you identify decayed wood and what are the recommended actions to take? First, be sure you actually have decay. The wood may only be harmlessly discoloured, for any number of reasons. See the publication in the side bar for help if your wood is stained but you’re not sure why. If wood is badly decayed, this will be quite obvious. The wood will be softer than normal and perhaps even be breakable by hand. Decayed wood often has a colour change, either darker or lighter than normal, although this could be due to weathering or could just be a stain. The wood may display an unexpected cracking pattern, or may look stringy- this is a sign of fairly advanced decay. If fungal growth is visible on the surface, the wood has quite likely already suffered strength loss even if this isn’t visibly obvious. However, do not rely on visual cues alone. Wood can appear stained and yet be sound, or can appear normal yet have already suffered significant strength loss due to decay. Some researchers or engineers use the pick test to determine if the wood is sound. They insert the point of a knife at a shallow angle to the surface and attempt to lever up a thin splinter. If the wood splinters with longer fragments, it is likely sound. If instead it breaks or crumbles in small pieces over the blade, it could be decayed. Decayed wood breaks somewhat like a carrot snapping in half, at one section, versus the splintering along the length of sound wood. See our Biodeterioration page to learn more about the science of decay. If you are still unsure whether or not you have decayed wood, you are advised to seek help from a wood restoration specialist. How urgent is a decay problem? By the time you notice decay, the wood typically has lost substantial strength already. In cases where the decayed wood is supporting load you are strongly advised to contact a structural engineer or other appropriate expert to more thoroughly assess the problem and proceed with a repair. A small, localized and non-critical case of decay may be a do-it-yourself project under some conditions. All decayed wood should be removed. If you are unable to remove the entire affected piece, remove the decayed portion plus an additional portion of adjacent wood beyond the visible decay. A rule of thumb is to remove an additional two feet (60 cm) of adjacent wood from each side, although this will of course depend on the extent of the decay. The removal of adjacent wood is because the fungus may have extended deep into the wood beyond the area of decay and may be ready to cause more damage in adjacent sound wood. Then apply a field treatment to the remaining adjacent wood, such as a borate solution in roll-on, rod or paste form, before replacing the removed pieces. Use treated or naturally durable wood to replace the removed pieces. If damaged wood must be left in place, a penetrating epoxy can sometimes be applied as a stabilizer. In those cases and for best results in all wood repair projects we recommend you consult with a wood restoration expert. Indoors, it is extremely important that you find the source(s) of the moisture that allowed wood decay fungi to grow. If you had wood decay in a location that is supposed to be dry, then you have a leak or a condensation problem that needs fixing to prevent any future problems. Look for primary and secondary sources of moisture. A short term leak may have allowed decay to start, for example, and condensation may be sustaining the decay. If the location of the decayed wood was outdoors or in a wet location, you need to use treated or naturally durable wood. If you have building moisture problems on a large scale, you need to hire some experts and be prepared for a potentially substantial remediation project. Seek out a qualified consultant, who will begin by using a variety of techniques and tools to determine the extent of the damage. This will include a visual examination for staining, bulging, cracking, presence of water, and warping. Subsurface moisture penetration will be tested with probes and/or thermography. In a building with wood structural members, the consultant will probably use a moisture meter to sample wetness of structural wood components in several locations. Based on the results of this investigation, the consultant will recommend a course of action for repair and future prevention. Canada Mortgage and Housing Corporation has developed a guide for building envelope rehabilitation, in two volumes: one for owners, one for consultants. More Information Click Here for a fact sheet Discolourations on wood products: Causes and Implications for help if your wood is stained and you’re not sure why. Click here for more information on biodeterioration and the science of decay. Click here for more information on remedial treatments. Click here for links on decay assessment and other durability topics
Choosing and Applying Exterior Wood Coatings
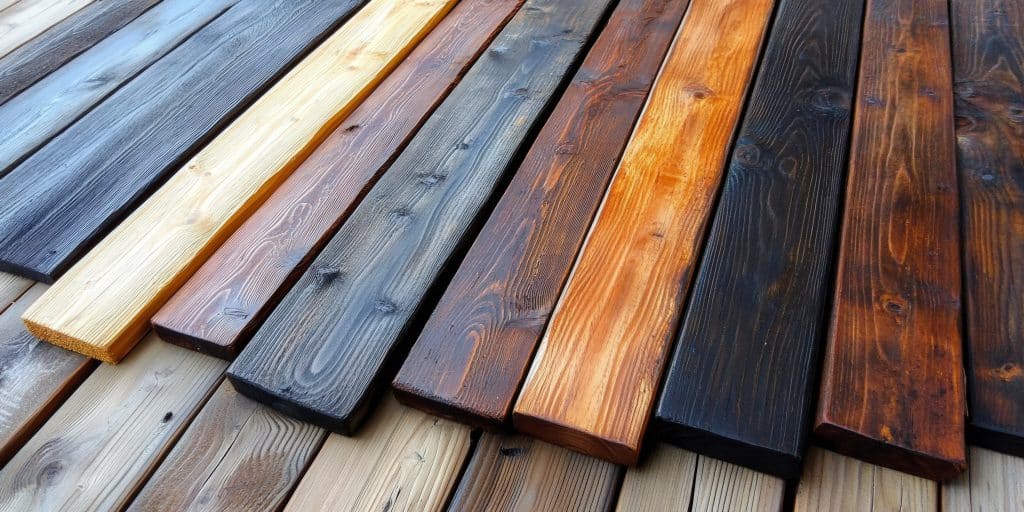
Choosing a coating depends on what appearance is desired and what level of maintenance would be tolerable. For many people, the basic choice is paint versus stain. The trade-off is often between maintenance frequency and appearance. For many people, additional criteria include VOC emissions, ease of clean up, and cost. See our Links page for web sites and books with detailed information on choosing and applying wood finishes. Read our About exterior wood coatings page for an understanding of the differences between paints and stains, pigmented versus clear coatings, and so forth. Because exterior wood shrinks and swells with moisture changes, the coating needs to be flexible. Flexibility varies by product – some products may be clearly identified as suitably flexible for wood’s dimensional changes. Water-borne coatings are generally more flexible than alkyds. Coatings containing urethanes tend to be more flexible than coatings containing acrylics. For factory finishing with transparent coatings, with special considerations for UV and mildew control, please see our fact sheet Factory Finishing with Transparent Coatings: Requirements for Maximizing Longevity. Special Considerations If a coating is desired for a wear surface such as a deck or stairs, consult carefully with the coating manufacturer to choose the right product for this demanding application. All coatings will be challenged by foot traffic and increased exposure to weather in a horizontal application. High traffic routes will show wear faster than other areas. Paints and other thick film-formers may fail quickly in this situation, and a time-consuming refinishing process will be necessary each time the coating fails. Hence many people will find a stain the more convenient choice for decks and stairs. Knots may require a bit of extra care as some wood extractives or resin may leach out or bleed. Extractive bleeding can cause discolouration, but this can usually be prevented by applying special stain-blocking primers. In some species, especially the pines and Douglas-fir, knots and pitch pockets contain resin. The resin can bleed and may discolour the finish, leave hard beads of resin on the surface, or may otherwise interfere with the coating bond. The best way to prevent this is to purchase kiln-dried wood where the resin should be set (hardened and fixed in place). If painting is desired, choose higher grades of lumber as these will have fewer knots, and choose kiln-dried lumber if using a resinous species. If siding or sidewall shingles are to be painted, the US Forest Products Laboratory (USFPL) recommends they be backprimed. This application of a coating to the back side will plug the wood pores, preventing extractive bleed without blocking water vapour transmission and also preventing liquid water uptake. If possible, round out any sharp corners for best coating adhesion on these edges – for example, a square-edged stair tread will show coating degradation quickly, but bullnosed stair tread edges will retain a coating much longer. This is because a coating applied to a corner tends to pull away from the corner, leaving a much thinner layer there than elsewhere. Surface Preparation Durability of any finish is highly dependent on proper application, which includes good preparation of the surface to be coated. Specific details on surface preparation depend on what condition the wood is to begin with – read on for tips that apply to various scenarios. Surface Preparation for Fresh Wood While fresh, clean wood can be coated without surface preparation, a light sanding with 100 grit sandpaper (and dust removal) can double the service life of some water-based coatings. For best results apply a coating to a fresh wood surface as soon as possible after planing or sanding. If exposed to rain and sun for more than two weeks, adhesion of coatings will not be as good. The surface must also be free of anything that will interfere with coating adhesion, such as dirt, damaged wood fibres and moisture. Grade stamps on wood should also be removed before applying a semitransparent stain, preferably by sanding. Cleaning If there are discolourations caused by dirt, iron stains or other discolourations on the wood surface, cleaning may be desired. It is always preferable to achieve cleaning with sanding when possible. Another safe way to clean wood without damaging the surface is to simply use a garden hose, with or without a pressure nozzle. Use pressure-washing only with extreme care as it can damage wood, especially low-density species such as western red cedar. The pressure should be kept at a minimum, and never hold the nozzle in one place for a long time. If necessary, use a little bit of dish detergent, and lightly scrub (not with steel wool, as this will leave iron stains) in the direction of the grain for any stubborn discolourations. For discolourations that resist soap-and-water cleaning, chemical cleaners will be effective. The chemicals in commercial wood cleaners can be caustic soda (sodium hydroxide), sodium metasilicate, oxalic acid, citric acid, phosphoric acid, borax or some mixture. Wood cleaners containing caustic soda at a 1% – 2% solution will remove nearly all discolourations with the least damage to wood. Some acid cleaners are especially effective for removing extractive stains and iron stain. Bleach is commonly used for cleaning wood, but we do not recommend this, since a poor wood substrate will usually be left behind for subsequent coating. Resin (pine pitch) can be generally removed with mineral spirits. Please note that all acidic or alkaline chemicals need to be thoroughly rinsed off before coating. Chemicals can be toxic, corrosive and harmful, so handle all these chemicals with care and follow all manufacturer’s instructions. Surface Preparation for Aged Wood Wood coatings need a fresh surface or the coating simply won’t last. The longer wood has been allowed to weather, the poorer the coating adhesion. If a fresh surface is allowed to weather or age outdoors for more than two weeks, coating adhesion will deteriorate. This is mainly due to wood damage from sunlight. Weathered wood surfaces usually have a higher acidity, higher contact angle, and lower surface energy. Restoring an aged wood surface is necessary before applying a coating. The damaged (aged/weathered) wood fibres must be removed, exposing fresh wood. Also,
Factory Finishing
Select heartwood where possible to minimize nutrient content of wood surfaces and prevent nutrients migrating through the coating to support fungal growth on the surface. Round all corners to minimum 5 mm radius to eliminate sharp edges where coating can thin out. Prepare surface by sanding with 100 grit sandpaper to physically and chemically activate the surface. Pretreatment and coating should be applied immediately after sanding. Research shows sanding can double coating life. Pretreat with an aqueous formulation containing a UV absorber designed to absorb the visible light that must penetrate transparent coatings to permit the wood to be visible. If the subsequent coating is not completely opaque to UV light, a hindered amine light stabilizer should be added to the visible light protection system. Not only does a visible light protection system prevent degradation of the wood-coating interface, it also prevents release of lignin breakdown products that can be used as a food source by black-stain fungi and prevents light induced breakdown of the biocide components. This pre-treatment must also contain three low-dose carbon-based biocides with differing chemistries to provide cross protection against detoxification and with complementary spectra of activity providing resistance to the full range of black-stain fungi. It should ideally have water repellent properties and must maintain wood surface pH close to neutral or slightly alkaline. Apply a transparent water-based catalyzed urethane coating, containing organic and inorganic UV absorbers with absorbance that extends from UVB through to the high-energy part of the visible spectrum (violet light). The coating must virtually eliminate UV from penetrating to the wood, preventing breakdown of wood, biocides and water repellents. This coating will be formulated to be damp-wood friendly to allow application soon after pre-treatment. It will contain no nutrients for fungal growth. It must have an optimum combination of moisture excluding efficiency and vapour permeability to minimize moisture uptake and allow drying after rain. The first coat to be designed to penetrate and bond to the wood, subsequent coats to be designed to ensure maximum intercoat adhesion without sanding between coats. Sufficient coats to be applied to give a film thickness no less than 60 microns to minimize the ability of black-stain fungi to penetrate the film with their infection pegs. The surface layer to have sheeting rather than beading properties to ensure rapid drying after rain or dew, reducing the time available for spore germination. Additional detailed information on coating wood surfaces has been assembled by the Joint Coatings and Forest Products Committee (http://www.fpl.fs.fed.us/documnts/pdf2004/fpl_2004_bonura001.pdf, 2004).
Performance Factors
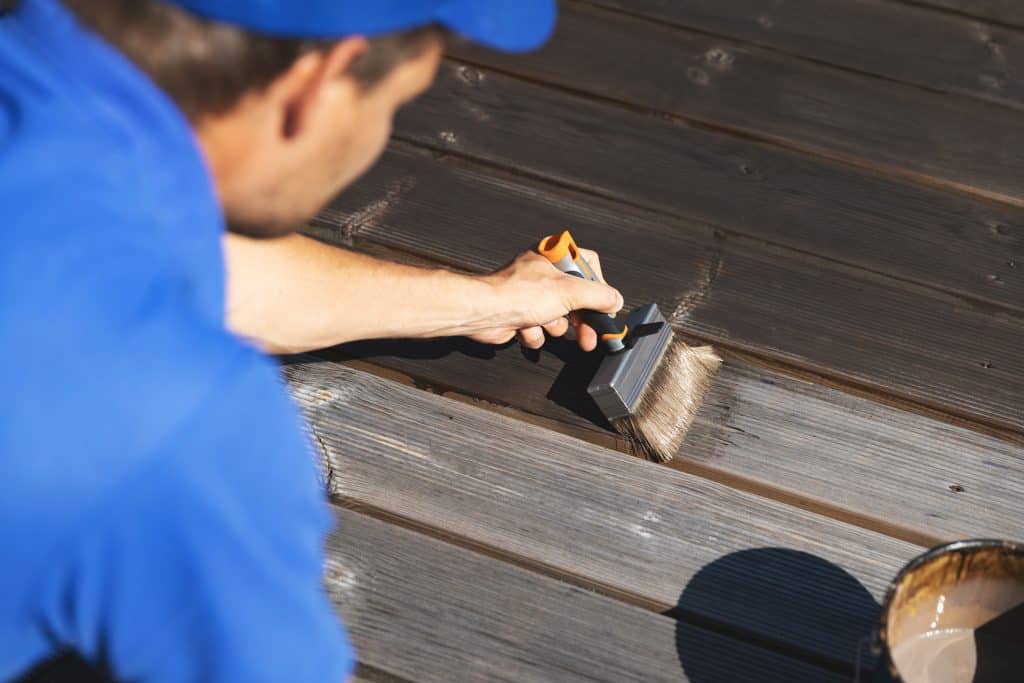
How long will an exterior wood coating last? Anywhere from a few months to 20 years or more, depending on the choice of product, how it was applied, and how severe the environment. Paints tend to last the longest, assuming they are applied properly (see Choosing and applying exterior wood coatings page). But the range of lifespan for a paint coating is very large. A low quality product badly applied to a weathered wood surface may barely last two years. If everything is done right, the coating might last 20 years. High quality paints and stains generally last longest, and coatings that are in locations protected from sunlight and water tend to last longer. Stains and water repellents have much shorter lives than paints, but are easier to maintain. This is one of the reasons they are a popular choice for stairs and decks. Depending on the degree of exposure to sun, water, foot traffic, and the pigment amount in the stain, expect a life of 1 to 2 years for a stain applied to deck boards and 2 to 5 for a stain applied to products that are not subject to wear. Water repellents generally last 6 to 12 months. Results from numerous tests on exterior wood finishes by many experts in this field, particularly by the US Forest Products Lab (USFPL), are summarized below. See the USFPL link for more information. Effect of wood anatomy Coatings, particularly solid colour stains and paints tend to last longer on dimensionally stable species such as western red cedar, eastern white cedar and Alaska yellow cedar, as these will shrink and swell less than other species and will therefore put less stress on the coating bond. However deck stains will not last as long on low density species such as western red cedar due to wear. Coatings last longer on wood with narrow latewood bands (the dark part of the annual ring) due to density differences between the earlywood (the light part of the ring) and the denser latewood. The southern pines are characterized by their wide bands of latewood, and therefore these species are considered to be somewhat poor for painting. The amount of extractives or resin in wood also affects coating performance. Special primers can be used to block water-soluble extractives, and kiln drying is most effective for fixing resin in wood. Nutrients in wood can migrate through the coating to support fungal growth on the surface, and heartwood can be chosen to minimize the nutrient content in wood. Effect of grain Finishes last longer on vertical (also called edge grain) versus flat grain, as these surfaces will shrink and swell less and therefore put less stress on the coating bond. However, it can be difficult to specify type of grain when ordering a product. Western red cedar and redwood may be available in a premium grade, which will likely be all heartwood, vertical grain. If using flat grain, place it bark side out or up if possible, because the grain is less likely to raise on that side, particularly in species with dense latewood bands such as the southern pines, and raised grain is a problem for coating adhesion. This is not an issue when using vertical grain products. Placing bark side out also minimizes checking. Effect of surface roughness Rough-sawn (saw-textured) or roughened wood creates a better coating bond and thicker coating buildup than smooth wood. The life of a coating can be substantially extended if the wood is roughened. Effect of sanding Sanding (100 grit) can double the life of a coating, for both weathered and freshly planed wood. This is because sanding removes any damaged surface fibres and also changes the surface chemistry to improve bonding of the coating. Effect of wood preservatives Semitransparent stains last longer when applied to CCA-treated wood – treated wood purchased prior to 2004 was probably treated with CCA. Research is under way on finishing for wood treated with new preservatives. Protection measures regarding use of treated wood apply when coating preservative-treated wood. Effect of bluestain Bluestain is caused by fungi, and bluestained wood is more permeable than unstained wood, therefore it may absorb more coating. Make sure to apply sufficient coating. Effect of weathering Sunlight quickly degrades the ability of a wood surface to bond with a coating. Research has shown a tremendous difference in paint performance on weathered versus unweathered wood. Paint on boards with no exposure to weather prior to painting lasted at least 20 years. Boards that had weathered for 16 weeks prior to painting began showing cracks in just 3 years. For maximum coating life, sand the surface if the wood has been exposed to any sunlight at all, particularly if for more than two weeks. Effect of product manufacturing Plywood: Coatings on plywood are challenged by the small cracks (face checks) on the surface that are caused by the lathe when the veneer is cut from the log during manufacturing. As the plywood goes through moisture cycling outdoors, these cracks tend to get larger and stress the coating bond. Plywood surface, edges and joints in outdoor applications should be protected, and coatings and other products for helping plywood resist cracking can be applied to prevent moisture ingress. Generally a good stain can effectively protect plywood. Since checking in stained plywood usually occurs during the first six months of outdoor exposure, best coating results can be obtained by applying a first coat and allowing any checking to occur, then six months or so later applying a second coat. Paints can fail quickly on plywood, unless efforts are made to reduce moisture uptake and also to use flexible products to accommodate dimensional changes of the wood. Roughening the surface is also important. For plywood protection and other issues with plywood, see the recommendations from the Canadian Plywood Association (http://www.canply.org/pdf/main/plywood_handbookcanada.pdf). Finger-jointed products: Coatings may perform differently on different parts of these products, as they are not likely to be uniform in grain orientation, in heartwood versus sapwood content, or even

